


Ever have one of those moments when you’re in the middle of a project and you realize something’s off? Maybe your kiss cuts were slightly off line or one sheet happened to turn out just a little bit better than another.
Well, those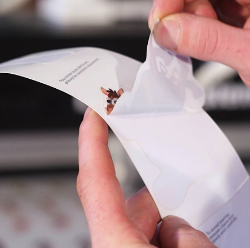 days are over. We have four set-up tips for you that will ensure consistent results the next time you try to kiss cut.
But first, let’s go over the basics. What exactly is kiss cutting? It’s a popular process that allows for the user to cut through the top layer of a material but does not penetrate the bottom layer, leaving it attached. This method of cutting is often used to produce materials such as labels or stickers. In those cases, only the sticker outline gets cut so the backing remains intact when peeled off.
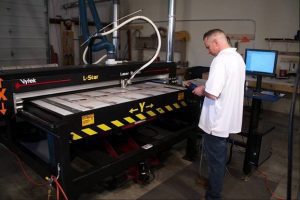
While kiss cutting can be done through various methods, the following tips are for a laser-based process. With this method you are able to receive a level of precision, productivity, and speed that can only be achieved through the use of a laser.
Now, what steps should you take during set-up in order to receive better, more consistent results?
- Always have a guide
When setting up your job, place a guide or a stop along the side of the machine. It could be anything from a piece of masking tape adhered to the table surface to an elaborate pre-made fixture designed specifically for your machine. Regardless of the type of guide or stop, much like a stencil enables consistent artwork, it will make it easier to position material, or substrate, in the same spot each time.
- Base off the corner
In a file run, your “home” should be based off one particular corner. Meaning, each time you place your materials/substrates on the table, you will align them in that specific corner. This allows the file to understand how far the laser head must travel to begin the first cut. If the file doesn’t run from the same corner, a vision system, such as the I-Cut Vision Pro SystemTM, will be required to register the substrate’s location.
- Optimize the cut
Before allowing your process to run, make sure that you optimize your cut. Cut optimization is accomplished by efficiently ordering cuts based on their position relative to where the laser head is over the substrate. Cut sequence can be viewed and changed from within your file. Optimal cut ordering will prevent the laser from jumping around, this reducing the amount of time spent per process.
- Cover the area of the table not in use
Laser cutting vaporizes the edges of the material being cut. Fumes from vaporizing require evacuation to maintain a clean cut area and avoid smoke damage. Since fumes rise from below the table, covering any unused/open area parts of the table focuses the evacuation on a smaller surface area, resulting in a faster, more powerful exhaust system draw. Simply use materials such as paper and tape to cover unused areas.
On a side note, the same rule applies when using a suction table. Covering the open areas increases the suction on your work area.
Conclusion
A little preparation goes a long way toward achieving consistent kiss cutting results. The next time you cut, be sure to keep these tips in mind.
Have more kiss cutting tips or some thoughts about these? Join the conversation and leave your comment below.
Vytek has solved thousands of unique application challenges over its 26 year history of manufacturing CO2 and Fiber laser cutting, marking and engraving machines. Call us to discuss yours: 978-342-9800.